A Call To Action (CTA) is one of the most important elements of a website. It helps guide visitors to take action—such as clicking a button, learning more about your service, or contacting you. WordPress makes this easy using Gutenberg Block Patterns.
Here I am sharing you how to add a Call To Action section in WordPress using the Gutenberg editor, step by step.
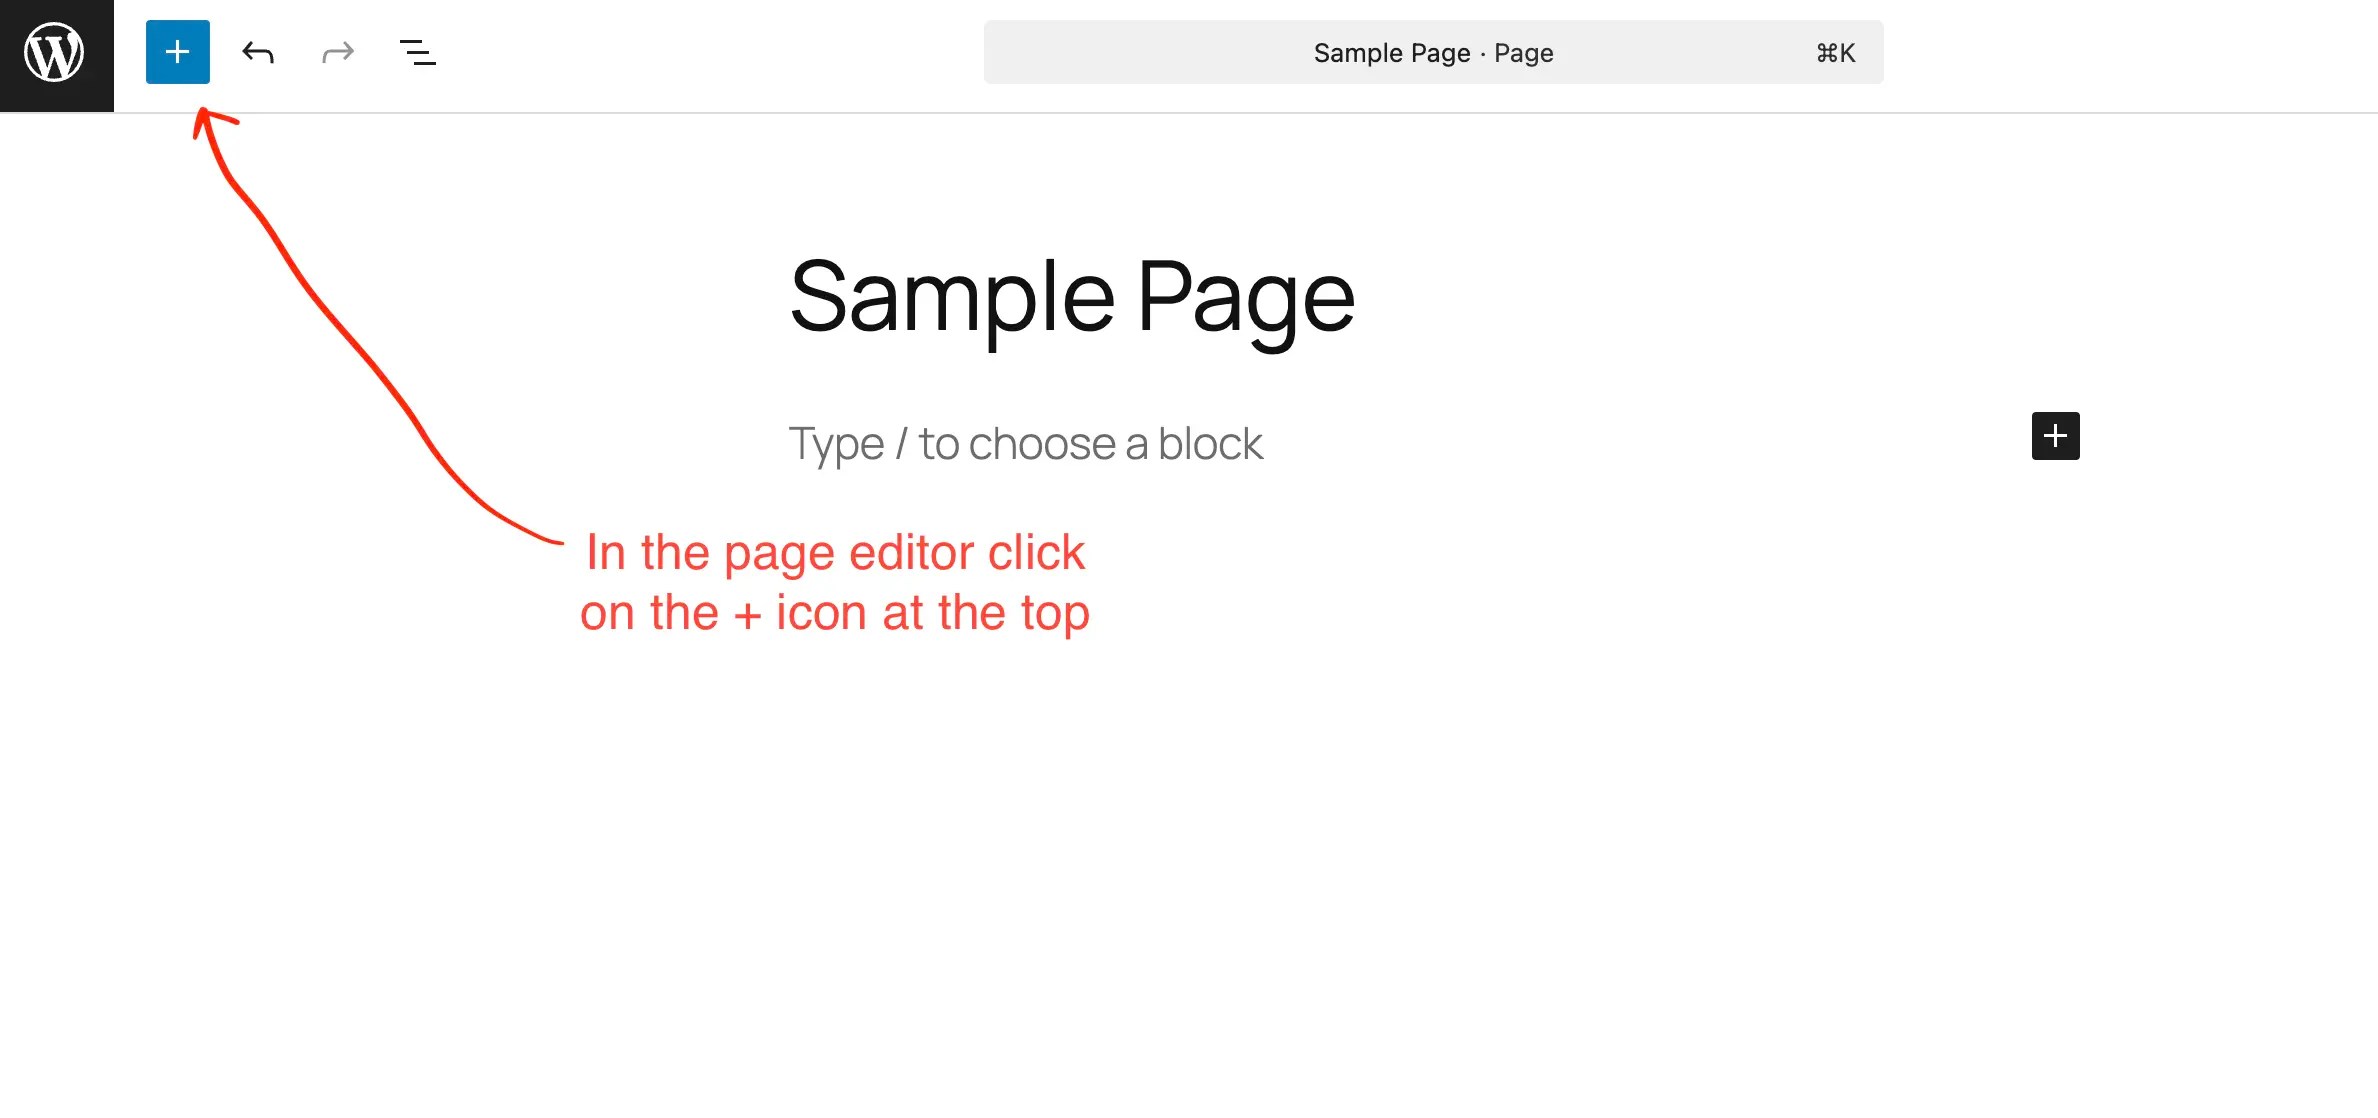
Step 1: Open the Page in Gutenberg Editor
- Go to Pages → Add New or edit an existing page.
- Make sure you are using the Gutenberg (Block) editor.
- In the page editor, click the “+” icon from the top toolbar.
- This will open the Block Inserter panel on the left side.
Step 2: Switch to the “Patterns” Tab
- Inside the Block Inserter, click on the Patterns tab.
- Patterns are pre-designed block layouts provided by WordPress and your theme.

Step 3: Select “Call to Action”
- Scroll down or select Call to Action from the pattern categories.
- On the right side, you’ll see multiple Call To Action design options.
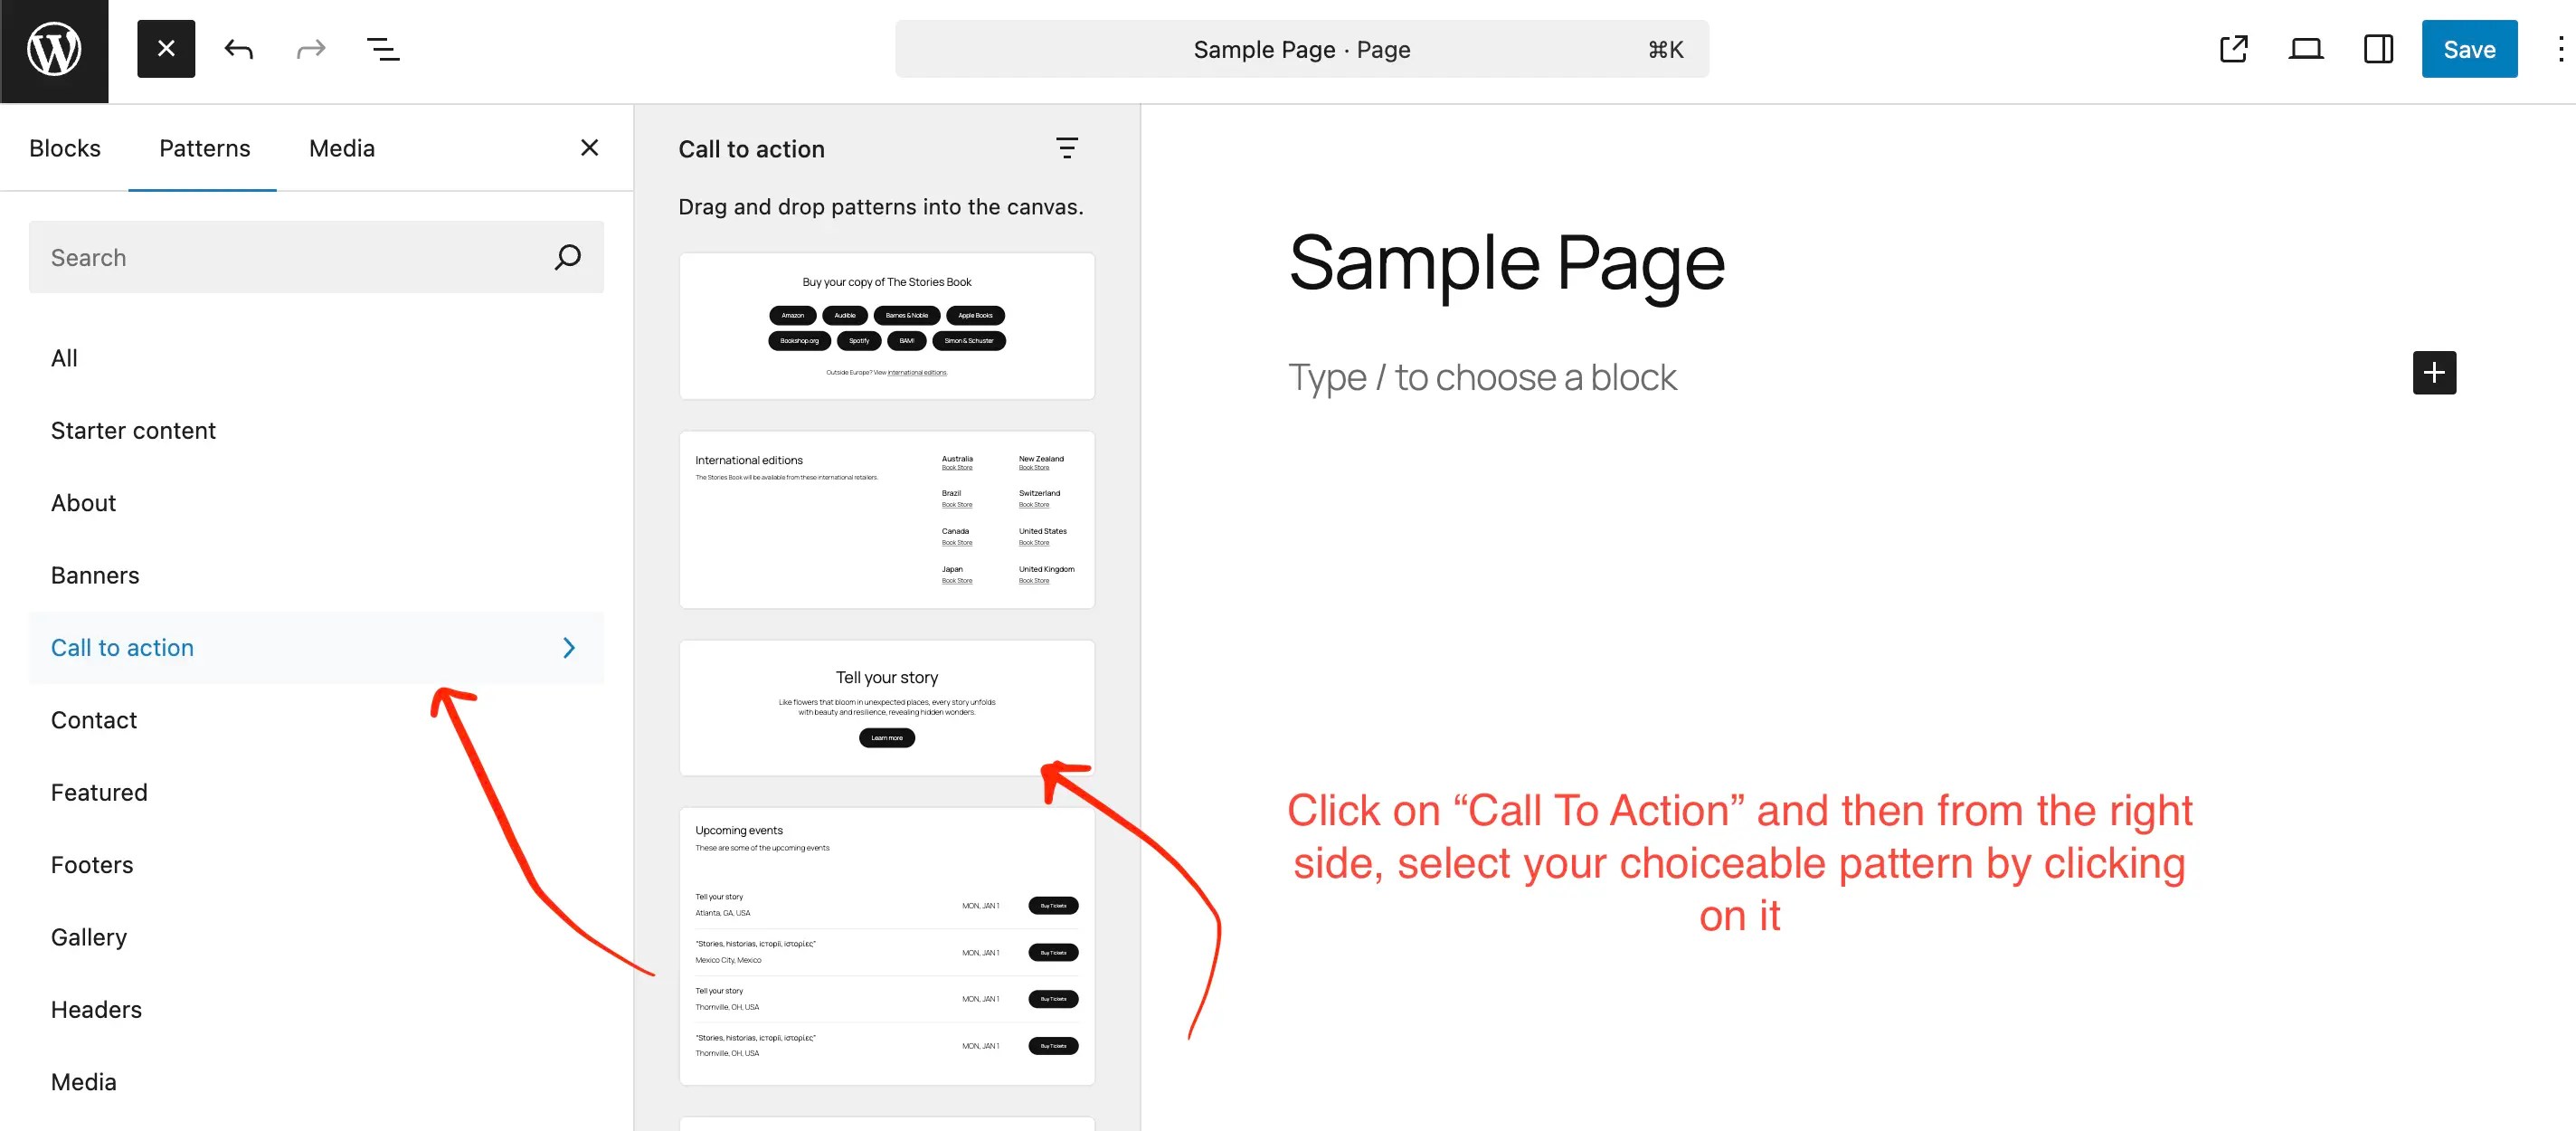
Step 4: Click Your Preferred CTA Pattern
- Click on any Call To Action pattern you like (for example: “Tell your story”).
- The selected pattern will be instantly inserted into your page content.

Step 5: Customize the CTA Content
Once added, you can:
- Edit the headline text
- Change the description
- Update the button text and link
- Adjust colors, alignment, and spacing using block settings
Step 6: Save or Publish the Page
- Click Save or Publish to make your changes live.

